Worry-Free Garage Floor Paint
By using the right brand of garage floor paint, you can transform your garage floor into a durable yet attractive centerpiece of your garage. Garages can become more than just a place to keep your car and store some loose items. Today, the garage is so much more, some include a workshop, gym or just about any other use you could possibly think of.
What is Garage Floor Paint?
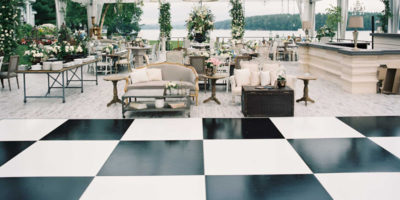
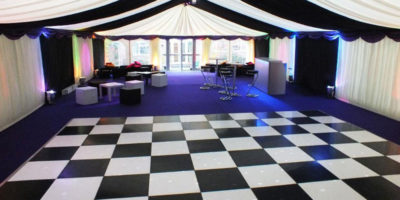
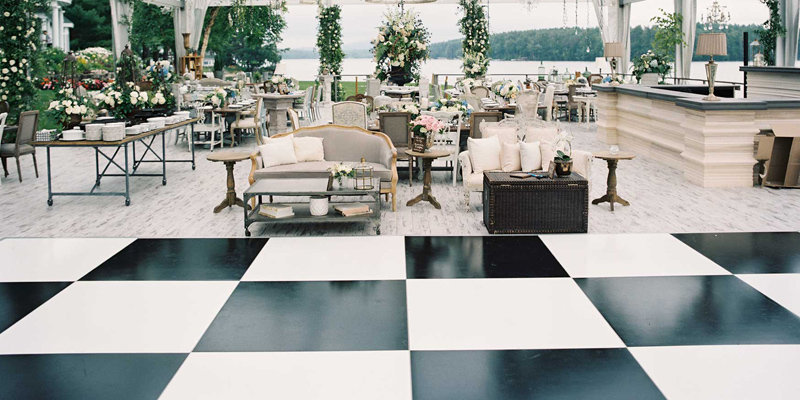
There are several different types of garage floor paints available on the market today with each having varying degrees of durability and style. The most common type of garage floor paint used by homeowners and contractors alike are epoxy based. These paints are a mixture of paint and epoxy chips that are applied in several steps. The resulting product is highly resistant to most stains and impact damage. In fact, manufacturers are so confident in their abilities to prevent damage that they offer lifetime warranties for most of their products.
The basic components of an epoxy garage floor paint system consist of a base coat, top coat, and epoxy chips. Some manufacturers will include a concrete cleaning solution in these system kits to prep the slab before applying the paint. Companies offer a huge selection of colors for both the base coat of paint and the epoxy chips that are applied in the paint. The resulting contrasts of colors are what makes them an attractive design feature for most garages.
Applying Epoxy Paint
Applying an epoxy garage floor paint is easy enough for even the novice installer to complete.
As with any garage floor installation, thoroughly vacuum the concrete slab before applying the base coat.
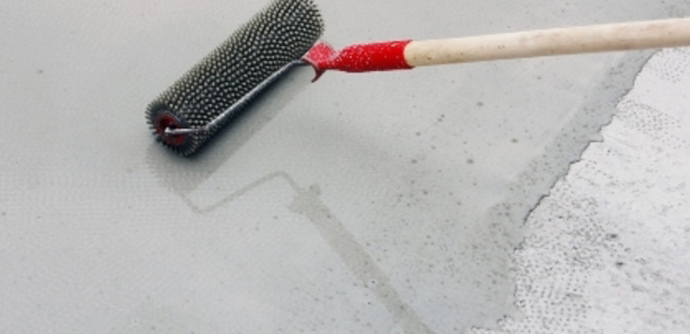
Starting with a small section, roll out the base coat using a standard paint roller fitted with a heavy knap for rough surfaces such as ¾".
While the paint is still wet sprinkle on the epoxy chips.
Repeat these steps until the entire floor has been painted and covered with epoxy chips.
Once the base coat has dried according to the manufacturer’s specifications the top coat is then applied over the entire garage floor. The top coat seals the base coat and epoxy chips while also giving it a high gloss shine.
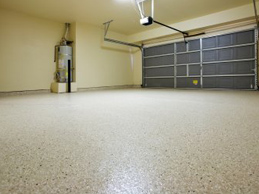
Installing the right garage floor paint will ensure that you get years of use out of your floor. It will also protect your floor while making it easy to keep clean. As most homeowner will attest, it takes a lot less effort to clean an epoxy coated garage floor than a uncoated concrete garage floor. With all the chores and "to-do" lists for around the house, the last thing you want to do is add cleaning the garage floor to that ever growing list.
Garage Flooring Options
 From epoxy coating to modular tiling, you have lots of choices for making your garage space much more attractive with a small amount of effort. Your best flooring option will depend on your plans for using the space. While garages used solely for housing a vehicle require a flooring option that can resist staining, a garage that works as an extra room for the home may need something that offers more comfort. Check out these options to decide which might suit your home.
Tip: Regardless of the option you choose, be sure to properly repair any cracks or holes in your garage floor before beginning any new flooring projects.
Coatings vs. Coverings
To make the best choice, it’s important to determine whether you want to coat your current garage flooring or install a covering on top of it. A coating option requires you to apply a material onto the flooring with a roller. The main coating products are epoxy and paint. While both of these use the same application process, there are differences in their chemical components and durability.
Covering products are installed on top of the floor and can be removed if necessary. This option includes mats and tiles that are available in a variety of colors, sizes, and materials.
Epoxy vs. Paint
A fresh coat of concrete paint will quickly cover any staining and brighten your garage floor space. Latex concrete paint is inexpensive, easy to apply, and a breeze to clean up.
Floor epoxy is more difficult to prepare and apply; however, it is tougher and resists damage and wear longer. Epoxy provides a polished luster and is also stain and water-resistant. If you choose this option, be sure to read all of the instructions provided by the manufacturer before you begin the preparation and application process.
Rubber vs. Carpet
Rubber flooring is an excellent choice if you are using your garage space as a workshop. The cushioning of the rubber will provide you with the comfort you need to stand for long periods of time and will also prevent damage to tools and equipment that may accidentally fall. Rubber can become damaged by oil and other automotive chemicals, so it’s not an effective choice for installing in an area where you keep your vehicle. If you plan on dividing your garage space so that half of it is for your car and half for your workshop, consider using two flooring options. You can apply an epoxy where you park your vehicle and install rubber flooring where you work on your projects.
Carpet tiles and mats are a fantastic option if you are using your garage as an extra play room or office space. By installing a carpet pad over your concrete slab before you lay your carpet, you can create even more comfort. Selecting remnants and end pieces of carpet can help you reduce your flooring costs. Visit your local hardware and flooring stores and speak with their sales representatives about your plans. They may be able to provide you with a selection of discounted pieces for your project.
How to Paint a Garage Floor
- What You’ll Need
- Tape measure
- Stiff-bristled scrubbing broom
- Vacuum
- Pressure washer
- Duct tape
- Floor etcher
- Rubber boots
- Safety glasses
- Garden pump sprayer
- Epoxy paint
- 3/8-inch nap paint roller
- Extension pole
- Paint trays
- Anti-skid material
Painting your garage floor is a good way to protect it for many years to come. The total process can take up to three days, but proper planning and prep can make it easier to get the lasting result you want.
Step 1 – Plan
Before you start anything, make sure the weather is in your favor for the duration of your project. Epoxy doesn’t like humidity or rainy weather during application.
Special two-part epoxy paint is your best option for a garage floor. Before buying, however, measure your square footage and decide whether you want one or two coats of paint so you know how much you’ll need. The label on your paint will give a suggested coverage in square feet. In some cases, you can also get the paint tinted to your desired color.
Step 2 – Prep and Clean
First, check your floor for cracks and potholes. These have to be repaired and the patches must cure before you start the etching process. You also need to find out if there is still sealer on the concrete. If water beads up on the floor, then there is a sealer on it and it will have to be chemically removed before you can paint with epoxy. You can only coat the floor if it is not chipping or peeling.
Sweep or vacuum the floor thoroughly and wipe up any oil spills. Then, hose it down with a pressure washer or high pressure nozzle on a regular hose. Once it’s dry, test several sections for cleanliness by taping a strip of duct tape to the floor. If there is any dust or residue on the tape when you pull it up, you will have to keep cleaning until it’s gone. Any debris left on the floor will be detrimental to your paint job.
Step 3 – Etch the Floor
Next, you will need to etch your floor to give the epoxy paint something to grab on to. To do this you can either buy a specially formulated floor etcher at a hardware store or make your own with muriatic acid and water. Whichever you choose, get on your rubber boots and safety glasses before starting.
Spray the etching solution onto the floor with a garden sprayer in four-foot by four-foot sections. If the solution is working correctly, it will foam up. Let it sit for 10 to 20 minutes, and then scrub with the brush. Scrub first in one direction before going in a perpendicular direction. Do not let the solution dry as you work. Rinse until the water runs clear, and then continue to the next section. The floor will look and feel like sandpaper if etching is done correctly. Let it dry for at least eight hours, but the longer the better. The floor has to be completely dry for the epoxy to adhere properly.
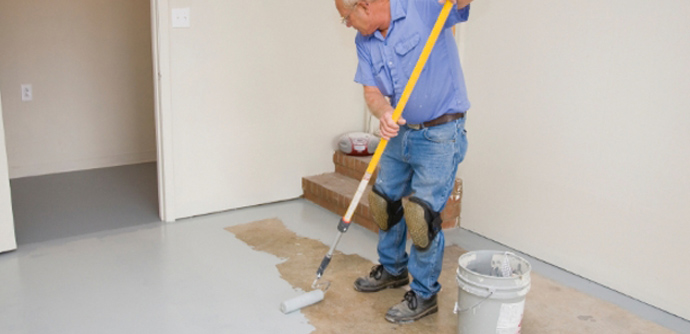
Step 4 – Paint
Now that your floor is clean, etched, and ready to be painted, open both cans that were in the kit and start stirring the paint. Slowly pour in the hardener as you continue to stir until it is completely blended. Have your roller and paint tray set up in advance as you will only have about two hours to work with the paint once it is mixed.
Compared to regular paint, epoxy paint will feel heavier and glue-like. Work in eight-foot by eight-foot sections, rolling in one direction first and then perpendicular just like the etching solution. Feather the edges so you don’t create any seams or lines. If you are going to do a second coat, let the first dry for at least 15 to 24 hours. Once the floor is done, do not walk or drive on for at least 72 hours. A full cure for an epoxy floor is about 30 days. If you live in a snowy or cold climate you might want to add some anti-skid material to the second coat of paint, which can also be found at the hardware store.
Epoxy paint is great protection for your garage floor, and it should last a very long time. Additionally, it will be much easier to clean than it was before. Wiping up dirt and oil spills will be as easy as if it were on an indoor floor. Your garage is now ready for your Lamborghini.


I have noticed you don’t monetize your blog, don’t waste your traffic,
you can earn extra cash every month because you’ve got
hi quality content. If you want to know how to make extra money, search for: Mrdalekjd
methods for $$$