Laminate Floor Repair
Laminate floor get a ding? Whether it’s a small chip or a big divot, you can repair it with simple, DIY techniques that make the floor look as good as new.
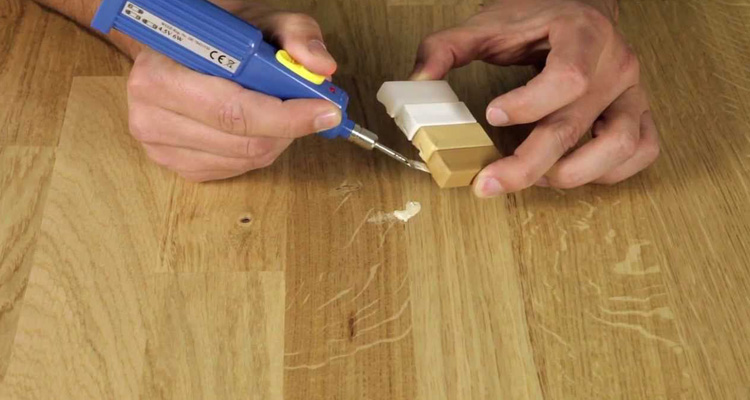
Step 1: Assess the laminate floor damage
You can fix minor chips and scratches in a laminate floor with filler products from the home center (see below). But if the damage is severe, you have to replace the plank (you did save a few from the installation, right?). It’s a job you can do yourself in about two hours. In addition to a spare plank, you’ll need a circular saw, hammer and chisel, router or table saw, drill and wood glue.
Some flooring experts recommend removing the base molding and unsnapping and numbering every plank until you get to the damaged portion. That works if the damaged plank is close to the wall. But trust us, if the damaged section is more than a few rows out from the wall, it’s actually faster to just cut it out. If your laminate floor is glued together, the unsnapping routine won’t work at all. See “Replacing Glued Planks,” below.
Step 2: Replace ‘snap-together’ planks
Start by drawing a cutting line 1-1/2 in. in from all four edges of the plank. Drill a 3/8-in. relief hole at each corner of the cutting line and again 1/4 in. in from each corner of the plank.
Cut out the center section with a circular saw, cutting from hole to hole (photo 1). Next, cut from the center section into each corner,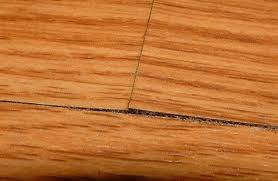 stopping at the drilled hole (photo 2). Finally, cut a relief cut from the center section out toward the seam of each plank. Tap a chisel into each relief cut to break out the uncut portion. Then remove all the cut pieces.
The new plank has a groove at one end and one side, as well as a tongue at the opposite end and side. But you can’t install it until you cut off the bottom lip of both grooves and the side tongue. Use a utility knife to remove them (Photo 3). Here’s a tip for cutting the groove. Stick the blade inside the groove and cut off the bottom from the inside (or use a table saw).
Apply a bead of wood glue to all four edges of the new plank. Insert the glued tongue of the new plank into the groove on the existing flooring and drop the plank into place. Wipe off any excess glue and load books on the plank until it’s dry.
Step 3: Replace glued planks
Most of the early laminate floors were fastened with glue. But that doesn’t mean you can’t do an ‘in-place’ patch on those floors too. Follow all the cutting directions shown for a snap-together floor. Then use pliers to break the glue bond (Photo 1). Clean off the old glue (Photo 2) and lay in the new plank.
Required Tools for this Project
Have the necessary tools for this DIY project lined up before you start—you’ll save time and frustration.
- 4-in-1 screwdriver
- Circular saw
- Drill bit set
- Drill/driver – cordless
- Hammer
- Pliers
- Putty knife
- Straightedge
- Utility knife
- Wood chisel
- Wood glue
Required Materials for this Project
Avoid last-minute shopping trips by having all your materials ready ahead of time. Here’s a list.
- Cleaning solvent
- Extra flooring
- Laminate floor patching material


I see you don’t monetize your site, don’t waste your traffic, you can earn additional bucks every month because
you’ve got high quality content. If you want to know how to make
extra $$$, search for: Mrdalekjd methods for $$$